GameFaq for King's Bounty
V0.1 November 2000
Copyright 2000 Chris Lee (chclee@yahoo.com)
Producer: New World Computing
Requirements:
You really need the game book!
Introduction:
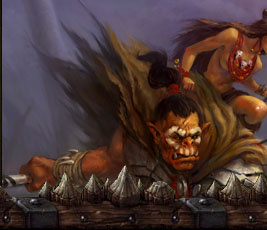
This was a pre-cursor for Heroes of Might and Magic (I, II, III). Previous
to the game, Arech Dragonbreath and Urthrax Killspite conspired to dethrone
King Maximus and seize his kingdom. Now, all the castles are held by the
evil henchmen or a group of monsters. King's Bounty is a story of a general
who is recruited by a kingdom to help find the Scepter of Power and thus
restore the dying King and kingdom.
Initially, the player must choose between one of four heroes:
Knight
Paladin
Barbarian
Sorceress
Indeed, as the book suggests, the Sorceress is the hardest, but also one can
go off the deep end with the Sorceress in terms of magic (described later).
Strengths/Weaknesses of Characters:
Knight: has highest leadership, best initial troops, average magic, quick
first advancement but slow advancement overall. He's the most all-well-
rounded character.
Paladin: slightly better in magic than a Knight, but will be weaker in
leadership and slow advancement, good initial gold. He's a balance between
Knight and Sorceress, but weaker than both.
Barbarian: very fast advancement, highest leadership, terrible magic, low
initial gold.
Sorceress: does not need to learn magic, great magic, terrible leadership,
low maximum income but good starting base commission, excellent initial gold.
Must use magic to enhance all abilities.
General strategies:
Knight will use magic to enhance (supplement) his battle abilities and allow
his troops to do a lot of damage.
Barbarian will in general be using the brute strength of his armies, with
some limited magic to beat down enemies.
Paladin will use a lot of magic to both enhance and supplement his battle
abilities, and this will help to lower overall death of troops.
Sorceress will often use magic to boost her leadership, battle, and
adventuring – all battle must be very planned.
Chart
Character Advancement
___________________________________________________________________
|TYPE / TITLE |VILLAINS|BASE |MAX SPELLS|SPELL PWR| BASE |
| |CAUGHT |LEADER| | | COMMISSION|
| | |-SHIP | | | /WK |
|________________|________|______|__________|_________|___________|
|KNIGHT | 0 | 100 | 2 | 1* | 1000 |
| GENERAL | 2 | +100 | +3 | +1 | +1000 |
| MARSHAL | 8 | +300 | +4 | +1 | +2000 |
| LORD | 14 | +500 | +5 | +2 | +4000 |
|________________|________|______|__________|_________|___________|
|PALADIN | 0 | 80 | 3 | 1* | 1000 |
| CRUSADER | 2 | +80 | +4 | +2 | +1000 |
| AVENGER | 7 | +240 | +5 | +2 | +2000 |
| CHAMPION | 13 | +400 | +6 | +2 | +4000 |
|________________|________|______|__________|_________|___________|
|BARBARIAN | 0 | 100 | 2 | 1* | 2000 |
| CHIEFTAIN | 1 | +100 | +2 | +1 | +2000 |
| WARLORD | 5 | +300 | +3 | +1 | +2000 |
| OVERLORD | 10 | +500 | +3 | +1 | +2000 |
|________________|________|______|__________|_________|___________|
|SORCERESS | 0 | 60 | 5 | 2 | 3000 |
| MAGICIAN | 3 | +60 | +8 | +3 | +1000 |
| MAGE | 6 | +180 | +10 | +5 | +1000 |
| ARCHMAGE | 12 | +300 | +12 | +5 | +1000 |
|________________|________|______|__________|_________|___________|
* Must learn magic to cast spells
You must get troops to defeat enemy troops and castles.
Chart
Place found/
_________________________________________________________________________
|MONSTERS |HIT PTS|MOVEMENT|ATTACK|SHOOT|COST|MORALE GROUP | SPEC |
|____________|_______|________|______|_____|____|______________|_________|
|CASTLE |
|Militas | 2 | 2 | 1-2 | | 50 | A | |
|Archers | 10 | 2 | 1-2 | 1-3| 250| B | SHOTx12 |
|Pikemen | 10 | 2 | 2-4 | | 300| B | |
|Cavalry | 20 | 4 | 3-5 | | 800| B | |
|Knights | 35 | 1 | 6-10| |1000| B | |
|________________________________________________________________________|
|PLAINS |
|Peasants | 1 | 1 | 1 | | 10| A | |
|Wolves | 3 | 3 | 1-3| | 40| D | |
|Nomads | 15 | 2 | 2-4| | 300| C | |
|Barbarians | 40 | 3 | 1-6| | 750| C | |
|Archmages | 25 | Fly | 2-3| 25 |1200| C | SHOTx2 |
|________________________________________________________________________|
|FOREST |
|Sprites | 1 | Fly | 1-2| | 15| C | |
|Gnomes | 5 | 1 | 1-3| | 60| C | |
|Elves | 10 | 3 | 1-2| 2-4| 200| C | SHOTx24 |
|Trolls | 50 | 1 | 2-5| |1000| D | (1) |
|Druids | 25 | 2 | 2-3| 10 | 700| C | SHOTx3 |
|________________________________________________________________________|
|HILLS |
|Orcs | 5 | 2 | 2-3| 1-2| 75| D | SHOTx6 |
|Dwarves | 20 | 1 | 2-4| | 350| C | |
|Ogres | 40 | 1 | 3-5| | 750| D | |
|Giants | 60 | 3 | 10-20| 5-10|2000| C | SHOTx6 |
|Dragons | 200 | Fly | 25-50| |5000| D | (2) |
|________________________________________________________________________|
|Dungeons |
|Skeletons | 3 | 2 | 1-2| | 40| E | |
|Zombies | 5 | 1 | 2| | 50| E | |
|Ghosts | 10 | 3 | 3-4| | 400| E | (3) |
|Vampires | 30 | Fly | 3-6| |1500| E | (4) |
|Demons | 50 | Fly | 5-7| |3000| E | (5) |
|________________________________________________________________________|
(1)Living Trolls regenerate to full hit points.
(2)Dragons are immune to magic.
(3)Ghosts absorb creatures they kill; on the week of the peasant, they
become peasants.
(4)Vampires heal their own wounds equal to the damage they inflict.
(5)Demons have a random chance of halving any troop.
Peasants and Sprites can't harm demons and dragons. This is a cool fact to
note.
Other notes:
Frozen units cannot move. They cannot attack, unless there is a unit beside
them.
"Fly" means you can move anywhere there is an open space, and then either
attack, move one space, or fly again.
Shooters cannot shoot if there is a unit beside them. You may wish to
judiciously put units beside the more powerful shooters (such as archmages or
druids), as their normal attack is much weaker than their shots. You'll want
to use this strategy a lot!
Damage may wrap around if you have too many of one unit! (ARGH!) If you
have over 400 archmages, it will do a tenth the damage. Or something like
that.
A B C D E LEGEND : N = Normal
H= High
A N N N N N L= Low
B N N N N N
C N N H N N
D L N L H N
E L L L N N
High Morale usually means you get some bonus to damage and not get hurt as
much. Potentially as much as +50%.
Low morale means you don't do as much damage, damage is halved.
Game play:
First, select the difficulty. This will affect the number of days left, as
well as how many moves per day. On the MAC version, there is only Easy,
Normal, Difficult, and Impossible:
DAYS LEFT MOVES PER DAY SCORE MULTIPLIER
Easy 900 40 x0.5
Moderate 600 30 x1
Difficult 300 20 x2
Impossible 200 10 x4
There are several elements of the game, divided into two categories. One is
the metagame or adventuring, the second is combat.
Metagame
The character in the metagame may move around by boat (if you have a boat) on
any water square, by foot (displayed by a mounted hero icon), or flying
(displayed by a hero on dragon). If you are sailing by boat, you can only
move in any of the 8 directions (N, NE, E, SE, S, SW, W, NW) on a water
square. What is helpful is that if monsters are 3 squares away (out of
sight), they will no longer follow you (assuming you are not time-stopped).
The only way to get to a new continent is also by boat.
Moving by foot, you must move to an open square.
If you move through desert, it automatically costs 1 day, unless you
timestop. If you are timestopped, each time you move to a dessert square
(that is, a new dessert square), your timestop counter will go to 0. In
other words, you will have to cast timestop each time you move a desert
square if you do not with to lose time.
There are treasures which you cannot get unless you can fly (Saharia), and
some you'll either need the bridge spell or a boat.
The elements of the adventuring metagame is collecting treasures, visiting
towns, collecting artifacts, and visiting castles (if possible). And if you
are not playing a sorceress, going to the area immediately above the castle
to learn magic.
King Maximus' castle does not have a name. But the closest town is
HUNTERVILLE.
As the book suggests, photocopy the charts to help you figure out which
villain is in which castle, as well as what spell each town sells. You may
also wish to research what armies each villains commands, but that's usually
not necessary.
Killing all enemy units is not necessary for winning, nor is capturing all
the castles. Castles are important (as are henchmen) for your final score,
and henchmen will give you pieces of the map essential for finding the
Scepter of Order. Killing enemy units is useful for giving you gold as well
as giving you time to buff up your army (e.g., I attack weaker unit stacks
and clone the heck out of my army).
Collecting artifacts
The best part of metagaming is finding the artifacts. I would highly suggest
that you find all 8 artifacts before you start fighting any battles (if
possible). They will help you greatly in your quest.
You will find the Ring of Heroism and the Articles of Nobility in
Continentia. I'm not sure what the Ring of Heroism exactly does in terms of
battle. The articles of nobility will increase the amount of commission you
receive by 2000 per week.
You will find the Shield of Protection and the Anchor of Admiralty in
Forestria. The Shield of Protection halves the amount of damage you take
from any enemy. The Anchor of Admiralty lowers your weekly boat rental from
500 to 100.
You will find the Crown of Command and the Book of Necros in Archipelia. The
Book of Necros effectively doubles your number of spells that you can carry,
and the Crown of Command effectively doubles your leadership (including any
leadership bonuses received). In other words, if you become a Barbarian
Overlord (from Barbarian Warlord), you will receive 10,000 leadership instead
of 5,000. Same goes with Treasure leadership bonuses.
You will find the Sword of Prowess and the Amulet of Augmentation in Saharia.
The Sword of Prowess adds 50% more damage when you attack, and the Amulet of
Augmentation increases your present spell power by 5.
Collecting treasures
As you go around, there are many places where treasures may be hidden.
Treasures may be in the 8 forms. The first are mineral deposits, which
increase your weekly commission. The second are a rogue band of monsters
which offer to join your party. (These are useful for quickly grabbing to
fortify a castle pretty cheaply.) The third are genies which may either
increase your spell power or spell capacity. The fourth are lairs, which you
may purchase followers. The fifth will give you a map to see the current
continent completely. The sixth is the map to allow you to travel to the
next continent. The seventh gives you some random spells. The final, and
most prevalent, are amounts of money, which you may either keep and increase
your current gold, or you may distribute to your followers and increase your
leadership. (I highly recommend the latter because gold is fairly abundant
if you play this game correctly.)
Getting magic
If you are not a sorceress, at some point in time, you will need to get
magic. You may have to go along the path left of King Maximus' castle, and
the place that teaches you is in a cave immediately above the castle. (?
Cost money?)
Once you have learned magic, there are two spheres, combat magic, which you
ca only use in battle, and adventuring magic, which you can only use in
adventuring.
As mentioned before, if you have kept good records, you know where each of
these spells are being sold.
COMBAT
NAME COST EFFECT
Fireball 1500 25*spell power vs. 1 group
Lightning 500 10*spell power vs. 1 group
Turn Undead 2000 50*spell power vs. 1 group of undead
Resurrection 5000 Causes units which died to become alive, at 20*spell
power (you will still lose the points)
Clone 2000 Multiplies units at 10*spell power for 1 group
Freeze 300 Causes one group (preferably enemy) to not be able
to move or attack (except if you have a group beside them)
Teleport 500 Moves a group anywhere (enemy or friendly)
As you can tell, Lightning has the biggest "bang for the buck," and it is
sometimes advisable to have a few lightning bolts to get rid of a few weaker
units for less cost. Fireball is when you want to kill things faster. Turn
Undead only works on Undead. Demons are NOT Undead! Clone is very cheap for
getting very powerful units. For instance, buying 2 knights will cost 2000.
However, if you have maxxed out your spell power, you will probably get more
than 2 knights. Resurrection only revives dead units of a certain type, and
will max out to whatever your original stack size was. Freeze is highly
effective for pinning down one stack of shooters, fliers (except dragons, who
are immune), and fast movers. It is also highly effective (although a little
on the costly side – trading off game points for money) when you have one
enemy stack left and you have some shooters left. Freeze the stack, shoot it
to death. Very nice elf/archer strategy. Of course, freeze doesn't do much
if you have a unit beside the frozen stack. Teleport is useful for putting
an enemy troop far away or moving one of your slow(er) moving stacks into a
strategy position. (I use this for teleporting knights when fighting Arech
Dragonbreath.)
ADVENTURING
Instant Army 1000 create an army unit based on spell power and rank
Town Gate 500 go to a previously visited town
Castle Gate 1000 go to a previously visited castle
Bridge 100 create a bridge for 2 spaces in any of the cardinal
directions
Raise Control 500 Raise Leadership by 100 * Spell Power
Time Stop 200 10 rounds*spell power
Find Villain 1000 Shows where current villain is (which castle) in the
contract
Instant army is a great overall spell; it gives you a lot of units. The
sorceress doesn't get as good units, but she can use the spell to get some
reinforcements to fortify a castle. Town Gate-Castle Gate combinations are
highly effective for getting reinforcements and moving around quickly, as
well as replenishing spells and visiting King Maximus. I find Bridge and
Find Villain fairly useless after the beginning. Raise Control will
temporarily elevate a spell caster's leadership until the end of the week.
Now, in combination of time stop, it gets abusive (you'll never really need
more leadership!)
Defeating enemy armies
As you move around, you will see various enemy armies peppered around the
map. I usually like to save them for later in the game, for two purposes, 1)
I can clone my own troops, or 2) for their gold.
Sieges
At some point in the game, you may wish to take over a castle, and you will
have to siege the castle. You must have a siege engine, which costs 3000 and
you must buy it in a town. Although it says that there is a random
probability it will break, I have never had one break on me. If you lose a
siege (i.e., all your armies are defeated, or you give up), you must buy
again before sieging a new castle.
Battle
Against the open armies (not in castles), all your stacks will be lined up on
the left and all the enemy stacks will be on the right. You get first
move/attack advantage, as well as spells. This is a huge advantage if you
know how the enemy fights.
Generally, you will want to kill his most dangerous units first, danger being
defined by 1) demons, who may half your stack, 2) other fliers, 3) shooters,
4) creatures with high move (especially ghosts). Creatures with higher
damage generally should out first.
One really useful maneuver is to freeze a front-line unit (you'll probably do
this with Ragface and Rinaldus) and his back units will get trapped, unable
to move.
Magic
The stronger your spell power (and spell capacity), the more you should be
using magic in general. Only one combat spell can be cast per round, so
carefully plan your attacks.
Ideally, you want to give your shooters as much time as possible, as well as
using magic to kill other stacks – for instance, archmages, giants, and elves
should all shoot to kill one enemy stack if possible, and then use fireball
to kill another stack, or freeze.
Contracts
You must have the contract for a known villain to be able to turn him in for
money. Otherwise, if you take his or her castle, he or she will escape to
some other castle.
Fortifying
When you destroy all enemy units, you will receive a certain amount of money
determined by what creatures you have beaten, and whether you had the
contract for a criminal. You will need to fortify the castle with a minimum
of one troop (even one peasant) for you to hold the castle. At the end of
the week, if it is not fortified, you have a random chance of losing the
castle, and a random group of monsters will now inhabit the castle. Instant
army and/or castle/town gates are helpful. (e.g., town gate to Hunterville,
grab one peasant, castle gate back and drop off the peasant)
Winning
You really don't need all pieces of the map to win. You will the centerpiece
to reduce the number of days required to search, and enough pieces to be able
to see the map.
Suggested game play
Phase I.
Exploration
I like to play the sorceress. She doesn't have permanent abilities quite as
high as the other classes, but she can temporarily pump up her abilities much
better than the others with time stop and raise leadership.
As soon as I start, I dismiss all armies except sprites (or whatever is the
cheapest army), and I rent a boat. I explore as much as possible, avoiding
any conflict. I'll pick up any treasures, and artifacts, visit towns and
castles. I occasionally use timestop to allow myself to pick up some
treasures guarded by monsters. I also go through the desert in continentia
so and pick up all the treasures and also visit castle Wankelforte so I can
castle gate back. I carefully note where each villain lies and what spells
are sold at which towns, and buy some extra timestops if possible. As soon
as I've picked up all the treasure I can, and have the two artifacts and the
map to Forestria, I go to Forestria.
Repeat, and also for Archipelia.
Saharia, I change my strategy slightly. I visit castle Uzare first and pick
up treasure thereabouts, and then I go to the middle and try to pick up
treasure. I'll also try to find either a dragons', demons', archmages' or
vampires' lair, buy a few (even sometimes just one), and then finish my
exploration of Saharia. If I have enough timestops, I'll just cast them and
buy as many dragons, demons, and archmages as possible, grab all the
treasures and artifacts, and visit castles Spockana and Zyzzarzaz. Then I'll
begin phase II: The War Campaign!
Phase II.
The War Campaign
Now that I've got my army, I'll want to kick some butt as quickly as
possible. I'll split the campaign into 5 subphases in order of difficulty.
Also, I tend to have two combinations of armies:
Combination 1 ("power"): Dragons, Demons, Archmages. Possibly as well
(later) vampires, giants, and/or knights.
Combination 2 ("shooters"): Archmages, Elves, Druids, Giants.
SUBPHASE 1. Non-villain castles
These are fairly easy to take over, so you should just take them over as
quickly as possible.
SUBPHASE 2. The first 5 henchmen
The first 5 henchmen (Murray the Miser, Hack the Rogue, Princess Aimoila,
Baron Johnny Makahl, Dread Pirate Rob) are all relatively easy to beat up.
Especially the first two should be pushovers if you have archmages, dragons,
and demons.
Murray the Miser typically has many wolves, a lot of peasants, a lot of
peasants, a lot of peasants, and many militia. Typically, I fireball the
wolves (which should kill them if you are a sorceress with the Amulet of
Augmentation). Then fly in the dragons beside some peasants (but not close
enough so the militia can attack). The militia will not be able to do enough
damage to kill a single dragon though. I use the archmages and kill the
militia, and then clean up with dragons and demons.
Hack will require one fireball against his "some nomads" and two archmage
fireballs against the militia (two bands of "many militia").
Princess Aimoila, you can use one (or two) turn undeads, one on the
skeletons. I like to fly my dragons over beside his sprites and attack the
ogres, demons beside the other sprites. Archmage fireball the zombies, turn
undead the skeletons (or fireball). The sprites will pointlessly attack your
dragons and demons, and you're done.
All character classes should be able to upgrade to the next class after this.
The Baron is a little trickier. You may want two groups of shooters (not
just the archmages). Beef up your army with your new status, and perhaps get
elves or giants (or both). You can rearrange (reorder) your armies in
castles. You'll want archmages and giants/elves in the back, so this means
slot #1 and #2. What I usually do is fireball the wolves, archmage fireball
the orcs, shoot the archers, and then let the computer move, then archmage
fireball (or fireball) one group, and shoot the other. You may want to put
away dragons and demons on this one, and instead get
elves/druids/giants/archmages (all the same moral group). You should be able
to find 50-100 elves, 25 druids, 25 giants, and 25 archmages normally.
Dread Pirate Rob has a little stronger army, and if you are strong enough,
the same elves/druids/giants/archmages combination still works. Use druids
on the militia, archmages on the barbarians, fireball the archers, and use
the giants and elves on the elves (and if you kill the elves, shoot at the
last group of militia). Then it's pretty easy.
You get the idea. Basically, use fireballs and archmages to take out stuff.
You may sometimes wish to add druids and/or giants, and sometimes I play
around with elves. Generally, you want the strongest armies and keep enemies
away. As soon as you have captured enough villains, go up levels. It will
increase your leadership and your spell power/spell capacity, which is the
most important thing.
Town Gate to replenish your spells. Don't forget to fortify.
The first five henchmen are very easy, and you should not have to lose any
troops if you do this correctly. You may decide to start using Clone (as
it's cheaper and faster to clone archmages than buying them). You can use
the random armies lying around as fodder to clone your army. Don't let them
get out of control though!
SUBPHASE 2. The next four henchmen
The next 4 henchmen (Caneghor the Mystic, Bargash Eyesore, Prince Barrowpine,
Sir Moradon the Cruel) are a little harder. You will start taking losses.
With Caneghor, it will be useful to remember that if you put a unit (I use
dragons) beside them, they cannot fireball. I usually fly my dragons in, and
attack archmages. I arch-mage fireball the knights (which should kill them).
I usually either turn undead on the ghosts (if there are 15 or more), or fly
in demons to deal with them. You should be all set.
As sorceress, you'll want to level up again at King Maximus' castle. Build
up the army a little. I usually have at least 7000 leadership at this point,
so I'll get 200+ archmages and 200+ druids.
Sir Moradon has a lot of pretty mobile units with many hit points.
Combination #2 works best against these guys. First turn, you'll want to
archmage fireball the calvary and fireball the militia (they usually in
front). If they aren't shoot whatever is in front. Then your giants and
elves can shoot at the pikemen. On average, you'll kill one of the two
groups, and if you're lucky, you'll kill both. Second turn, archmage
fireball the knights (which should kill them), and either fireball/lightning
bolt or shoot with one of the groups the remaining pikemen. Don't forget
that you can't shoot if the pikemen are beside you.
Prince Barrowpine is your next enemy, and as he has a horde of Sprites
(usually in excess of 300), you'll at least want dragons and/or demons.
Combination 1 is best here, and you may want to freeze the archmages and fly
dragons into the center to paralyze the druids and elves. I usually archmage
fireball the pikemen (they're the most dangerous to my dragons) and fireball
the elves (this should be enough to kill the elves). Dragons can attack the
druids. The Sprites will impale themselves on the dragons, yawn. Second
round, I archmage fireball and/or fireball the archmages, clean them up with
dragons. You can also insert more shooters which may speed up the process.
At this point, all classes should have moved up to their second advancement
(second highest rank).
Bargash Eyesore is your next opponent, and he has a few giants, a horde of
orcs, and a lot of wolves, which will give you a hard time. I think your
best combination is Combination #2. Round 1, you'll want to fireball the
wolves (killing all of them), archmage fireball the Orcs (if you have at
least 40 archmages, you'll kill all of them), and druids should shoot the
giants (you'll need at least 60 druids). Elves can shoot at the remaining
giants or shoot at the trolls and ogres (they're slow). I believe the ogres
are in front. Round 2, you'll want to archmage fireball the trolls (you
should be able to kill all of them), fireball the trolls (you'll kill maybe
half), and then use druids, giants, and elves to polish them off. Move as
necessary.
At this point, you may have lost your first unit. If not, you're doing well!
SUBPHASE 3. The next 5 henchmen
The next 5 henchmen (Rinaldus Drybone, Ragface, Auric Whiteskin, Mahk
Bellowspeak, Czar Nickolai the Mad) are getting increasingly difficult. You
will probably need 2-3 turn undeads for Rinaldus, and 2-5 for Ragface. Do
them back to back, they're the easiest of this group. I don't like fighting
demons because of the halving factor. Combination #1 is your probable best
bet.
Against Rinaldus, I'll archmage fireball the vampires, shoot the demons with
giants or druids. I can either freeze the front group (usually skeletons),
buying me some more time, or turn undead. Freeze is slightly better. Round
2, archmage fireball the skeletons (with 70-90 archmages, you should be able
to kill them all), turn undead on the zombies (you'll probably kill about
half), use dragons to kill the ghosts. Shoot some of the zombies. Final
round (round 3), if needed, turn undead again and/or use druids.
Against Ragface, prepare to lose some troops. Usually, skeletons are in the
front again. I'll archmage fireball the vampires (90-100 archmages will take
care of them), shoot the demons with giants or druids. I can either freeze
the front group (usually skeletons), buying me some more time, or turn
undead. Freeze is slightly better. Round 2, archmage fireball the skeletons
(with 100, you'll kill probably 60-80% and finish them off with a turn
undead). Use dragons to kill the ghosts (with 25, you should be able to kill
them all, and take no losses, if you're lucky). Shoot some of the zombies
with druids and/or giants (you'll probably kill half). Round 3, turn undead
on the zombies and use druids and giants. That should kill them, although if
it goes out to round 4, be sure to move your units so they will not be
attacked. If there's a small amount of zombies, (like less than 20), you can
always use demons. You may want to have 3 groups of shooters and dragons
instead.
Use Combination #1 on Auric. You can freeze his nomads, archmage fireball
his giants, (his barbarians won't quite get to you), and shoot with druids
some of the nomads. Round 2, attack his peasants with dragons and demons
(which should kill them), archmage fireball the barbarians, and druids to
finish up the nomads. He's slightly easier than Mahk, for some strange
reason.
If you're a sorceress, you'll want to upgrade to Archmage. Build up the army
again.
Mahk is the first time you will meet dragons, and you can't do much about
them except hack away. Remember that demons are easier to replace than
dragons (as you can clone them). I usually archmage fireball the orcs
(killing them), fireball and druid lightning bolt and use giants to shoot at
the giants (killing them), and then fly in dragons in front of the dragons.
I will probably not lose any dragons, and I'll kill like 3-4. Second round,
I'll archmage fireball the ogres (usually killing them), fireball the gnomes
(killing about 70), druid lightning bolt to finish, and giants to shoot at
the dragons. I fly in demons to attack the dragons (usually losing a few),
and then finish them off with dragons.
Czar Nickolai has a lot of Castle units which are painful. Prepare to lose
units. You'll need a pretty large army. Pikemen are in front. I'll usually
fireball the archers and kill them. (If I'm lucky, I usually have spell
power between 25 and 29.) Use archmages and fireball at the knights. (Just
under 400 archmages should kill them all.) Use druids and lightning bolt the
pikemen. You should have about 150 druids. Usually I'll use giants in this
war, so I'll shoot the dragons for a bit (if you have about 120 giants,
you'll probably kill like 3-4 dragons). Then fly in the dragons and kill the
dragons. Move the demons beside the calvary and attack. You'll lose
probably a half dozen demons, and again when the calvary attack back. Use
archmages to fireball, druids to lightning bolt.
SUBPHASE 5: The final 3 henchmen.
The last 3 henchmen (Magus Deathspell, Urthrax Killspite, Arech Dragonbreath)
are a pain in the butt. You will just need to use superior numbers.
Magus Deathspell: I'll turn undead on the vampires (killing probably half).
I archmage fireball the demons first round and use druids to kill some
archmages (with about 200 druids, they'll probably kill about half). I'll
then fly dragons in beside the archmages. They don't really do enough damage
to kill any of my dragons and my dragons should kill most of them, if not all
– and when the archmages attack, they'll get killed. Move demons up to
attack peasants. The enemy vampires will come attack me, and may kill some
of my troop (probably druids or archmages). Use druids to kill the vampires,
archmage fireballs to finish the gnomes. Peck at the peasants with demons
and dragons until dead. If you add giants, you may be able to kill the
vampires without taking losses.
Urthrax Killspite: painful. I bring in knights this round. (That is,
Dragons, Demons, Archmages, Druids, Knights.) The other FAQ (by Chris Jones)
says there are archmages, but it's actually pikemen, and they're in the
front. Fireball the pikemen, archmage fireball the cavalry (you may be able
to kill all of them). Use druids to kill all the demons. He'll fly his
dragons in to attack your druids, so have knights in the fifth slot. Round
2: fly your dragons in and attack his dragons, use demons to attack his
dragon, and knights. You should have killed all of them. Use fireball,
archmage fireball, and druid lightning bolt to kill most of the knights. If
he attacks any of your groups (dragon or demon), he'll be dead. If there's a
round 3, finish him off with druids.
Arech Dragonbreath: ow. Pain. Yuck. You will need a couple of turn
undeads, and a lot of resurrections, plus your usual Dragons, Demons,
Archmages, Giants, and Knights, maxxed out. (I use like 600-800 knights,
just under 400 archmages, just under 400 Giants, and 400 Demons.) Yes, you
must have learned the timestop-raise leadership trick. I archmage fireball
the Demons. That should kill them. Turn undead should fry over half the
vampires. Teleport the knights in the midst of the three groups of dragons,
and attack the smallest group, or the group that's not the huge (100+) group,
in the middle. You may kill half if you're lucky. Fly in demons and dragons
to attack the group you've just attacked. Use Giants to throw rocks at
dragons. Vampires will attack your demons, you'll kill all of them, they
might kill a few. Round 2: Resurrect Knights. You will lose a lot of
knights. Sometimes I'll use my archmages too, because they have stopped
being useful, and I'd rather not lose demons/dragons/giants. If you are out
to the seventh round, then you can use the giants to attack. Usually by the
end of the second round, I've killed one group of dragons. By the end of the
fourth or fifth, I've killed the other. The 100+ group is still a hassle,
and you'll want your dragons or knights to take the retaliatory hit and use
demons (and you might half the group if you're lucky).
Alternately, you can substitute Vampires for Knights, since they have an
automatic resurrection factor (they heal their wounds for the damage they
do). The bad thing is that they don't do very much damage. (Vampires do 3-6
and have 30 hp; Knights have 35 hp and do 6-10.)
WINNING
When you recover everything, then you must look at the map and dig at the
right place to recover the Scepter of Order.
|